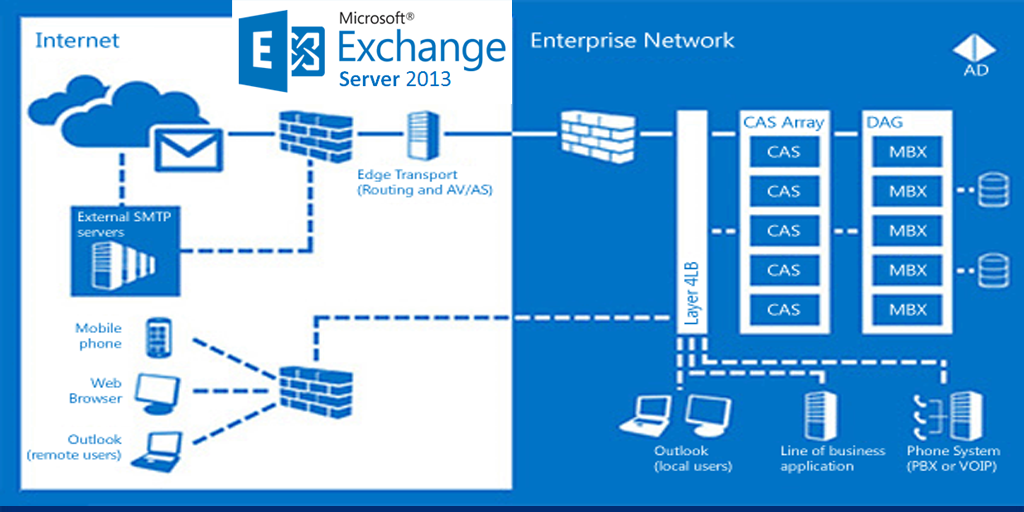
Exchange Server 2013 is an iteration of Microsoft’s Exchange server. Exchange Server 2013 is similar to Exchange Server 2010 in that the messaging platform can be deployed on-premises, in the cloud or as a hybrid solution in which some servers exist on-premises while others reside in the cloud.
This LAB scenario considers a single server deployment of Exchange Server 2013 with the Mailbox and Client Access Server roles. The topic is going to cover the below points.
- Hardware requirements check.
- Software requirements check.
- Server prerequisites check.
- Installation.
1. Hardware Requirements
As a starting point, we can consider the very hardware minimums for Exchange Server 2013
- 64Bit CPU.
- 8GB RAM for MBX, 4GB for CAS, or 8GB for Multi-Role.
- Page File = RAM + 10MB.
- 200MB free on system drive.
- 30GB Free on install drive plus 500MB for each language pack.
- 500MB free on queue drive.
- Disks formatted as NTFS.
2. Software Requirements
For a successful Exchange server 2013 installation, the following list of supported operating systems and utilities should be considered.
- Microsoft Windows Server 2012 64 bit
- Microsoft Unified Communications Managed API 4.0, Core Runtime 64-bit in Mail Server.
- Microsoft Office 2010 Filter Pack 64 bit in Mail Server.
- Microsoft Office 2010 Filter Pack SP1 64 bit in Mail Server.
- Microsoft Exchange 2013 64 bit in Mail Server.
3. Server Prerequisites
Since we will install both Mail Server role and Client Access role in the physical server, there are some prerequisites that needs to be taken care.
- The Active Directory forest functional level must be at least Server 2003.
- The Active Directory site must contain at least one Global Catalog server and a writable domain controller.
- Exchange Server must be member of Domain Controller.
- Perform Windows Update and reboot the Mail Server.
- Install .NET Framework 4.5 in Mail Server. In most cases, this feature is installed by default.
- Install Remote Server Administration ToolKit in Mail Server. Use PowerShell cmdlet
Install-WindowsFeature RSAT-ADDS - Run the following command in Windows PowerShell to install other required components.
Install-WindowsFeature AS-HTTP-Activation, Desktop-Experience, NET-Framework-45-Features, RPC-over-HTTP-proxy, RSAT-Clustering, RSAT-Clustering-CmdInterface, RSAT-Clustering-Mgmt, RSAT-Clustering-PowerShell, Web-Mgmt-Console, WAS-Process-Model, Web-Asp-Net45, Web-Basic-Auth, Web-Client-Auth, Web-Digest-Auth, Web-Dir-Browsing, Web-Dyn-Compression, Web-Http-Errors, Web-Http-Logging, Web-Http-Redirect, Web-Http-Tracing, Web-ISAPI-Ext, Web-ISAPI-Filter, Web-Lgcy-Mgmt-Console, Web-Metabase, Web-Mgmt-Console, Web-Mgmt-Service, Web-Net-Ext45, Web-Request-Monitor, Web-Server, Web-Stat-Compression, Web-Static-Content, Web-Windows-Auth, Web-WMI, Windows-Identity-Foundation - Install Microsoft Unified Communications Managed API 4.0, Core Runtime 64-bit in Mail Server. Download and install
- Install Microsoft Office 2010 Filter Pack 64 bit in Mail Server. Download and install.
- Install Microsoft Office 2010 Filter Pack SP1 64 bit in Mail Server. Download and install.
4. Exchange Server 2013 Install
Rename the Server, assign the static IP, join the server with root domain controller, restart the server, login with domain admin (Ex: E9Journals\Administrator) now we can start the installation process.
Start the installation with the Prerequisites .Net installation
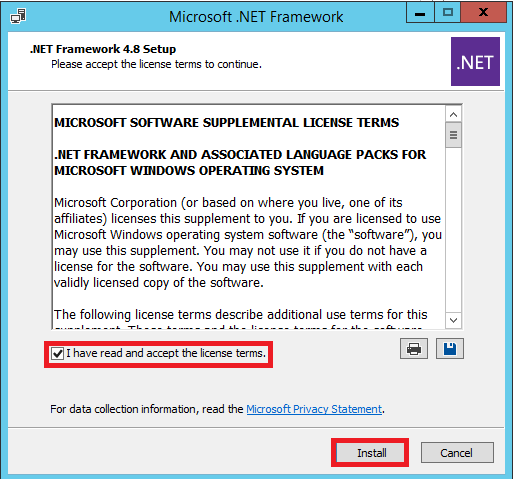
1. Run the .Net package and follow the installation as per the screen instruction to complete the installation.
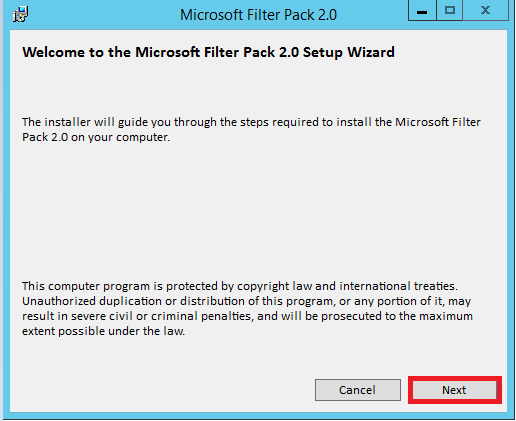
2. Run the Microsoft Filter Pack 2.0 package and follow the screen instruction to complete the installation.
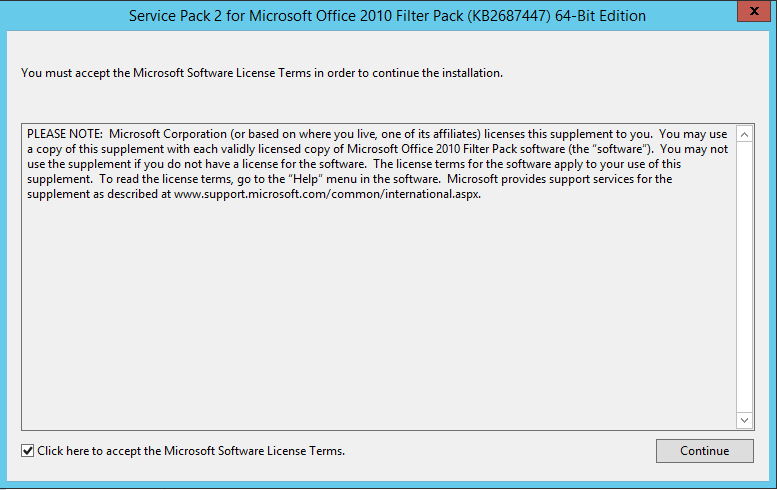
3. Run the Service Pack 2 for Microsoft Office 2010 Filter Pack (KB2687447) 64-Bit Edition and follow the screen instruction to complete the installation.
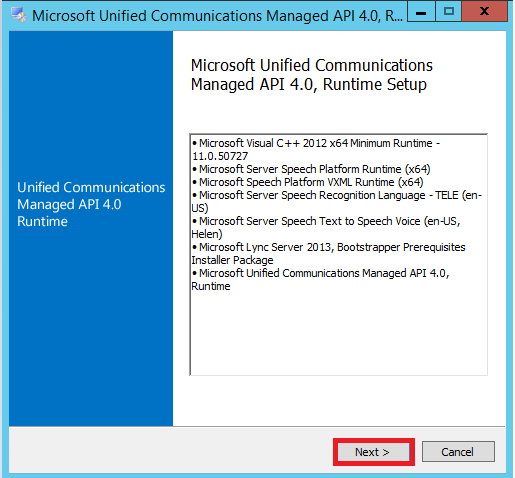
4. Run the Microsoft Unified Communications Managed API 4.0 and and follow the screen instruction to complete the installation.

5. Copy the Power Shell commands which I given in above prerequisite and run the command in Power Shell.
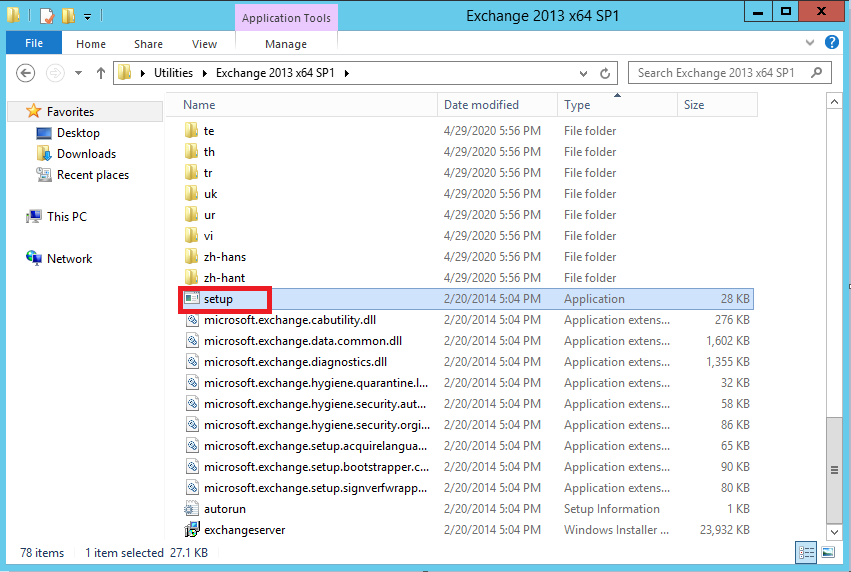
6. Open the Exchange 2013 package and click the setup.exe file, Once its started you can get the below screen.
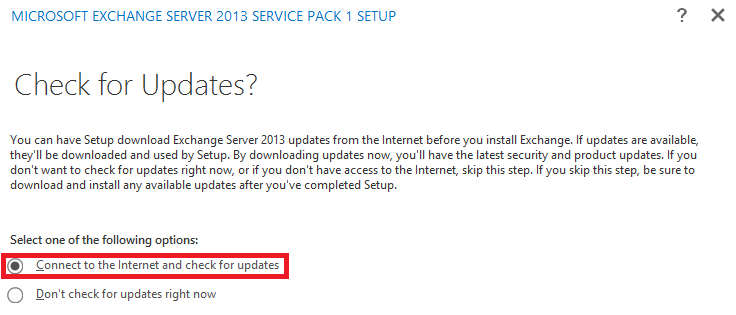
7. Once you got this above screen choose the radio button to Connect to Internet and check for update line and select Next button.
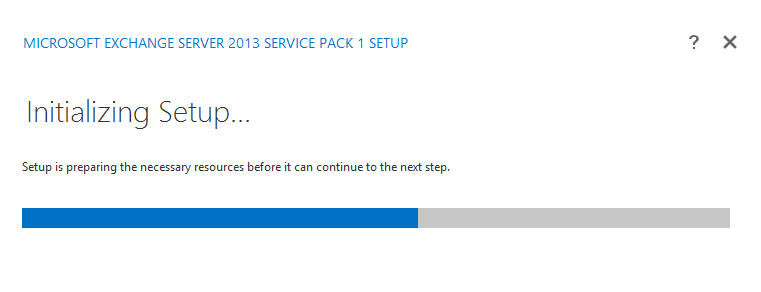
8. Initializing Setup have been started.
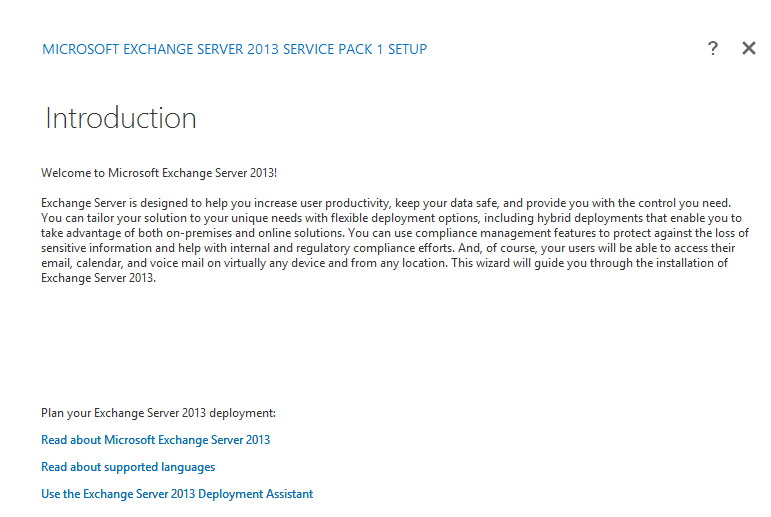
9. Read the introduction page and select the Next button.
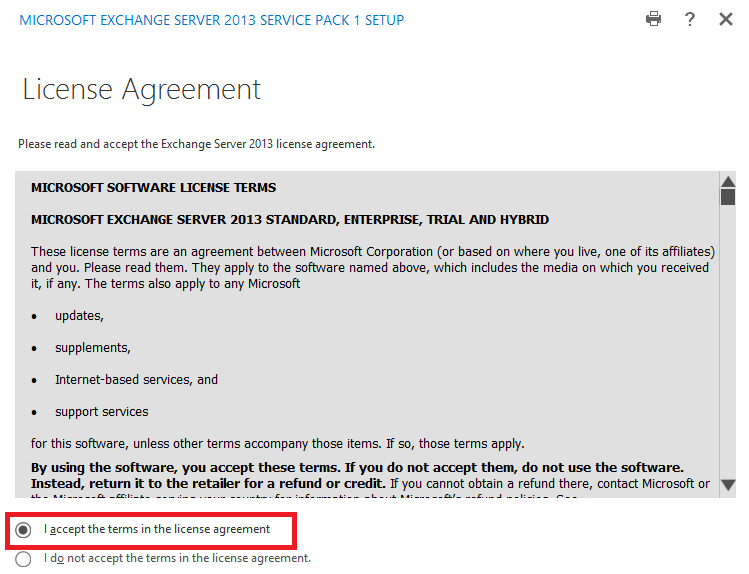
10. Read the license and accept the terms in the licence agreement and select the Next button.
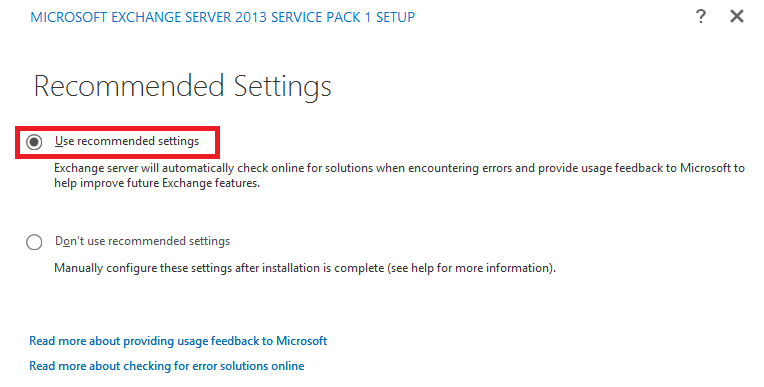
11. In this recommended setting page select the radio button in Use recommended settings and select the Next button for the coolest installation.
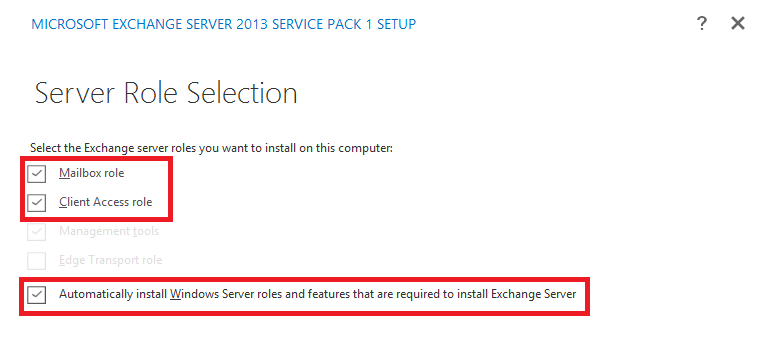
12. In this Server Role Selection we are going to install both roles Mailbox and Client Access role in the standalone server for our LAB purpose, moreover we can select both check box and Automatic installation Windows Server roles and features that are required to install Exchange Server check box need to be enable for the coolest Installation.
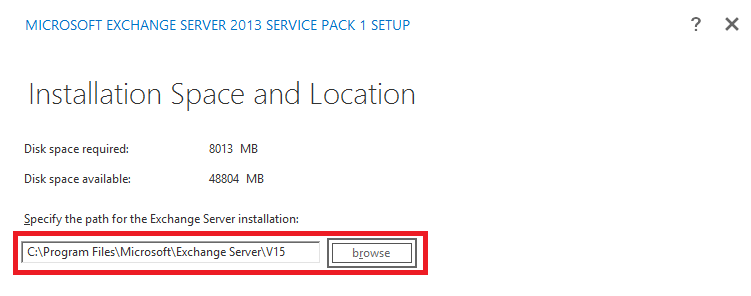
13. In this screen its asking the installation space and location according to your convenience you can browse and select the location, here Im going to continue with default location only.
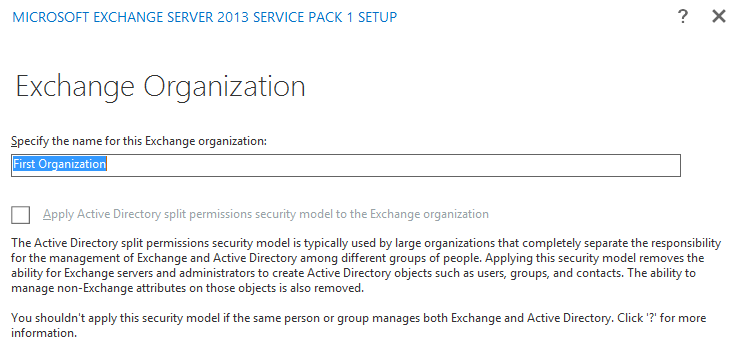
14. In this page we can specify the name of Exchange organization according to our own wish, here im going to continue with by default First Organization.
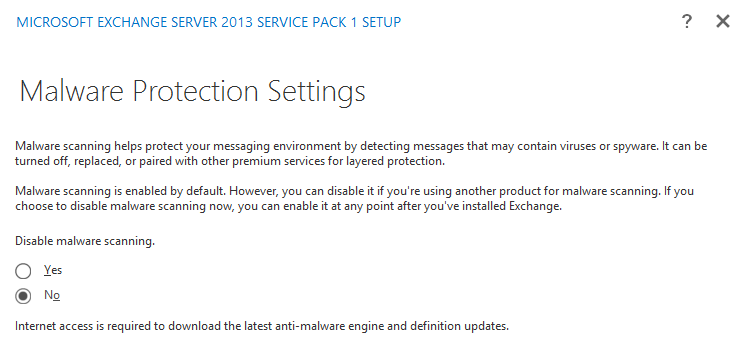
15. One of the new features of Exchange 2013 preview is the Malware Protection. Choose whether to enable or disable malware scanning and click Next.

16. Reading Checklist will take few minutes once it done you can get the below screen if there is any error or warning whatever it might be it will appear in the screen if its warning same like the above screen you can read and continue, If there is any error you have to fix before continue the next step, then only can get the successful installation, In our case warning only so that Im going to continue the installation.
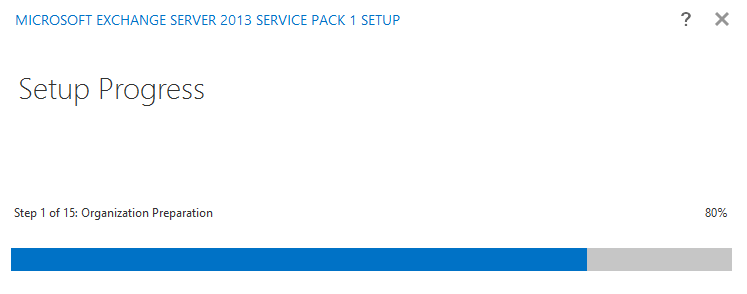
17. Setup Process is started it will take couple of minutes to finish once its finished you will get the below screen.
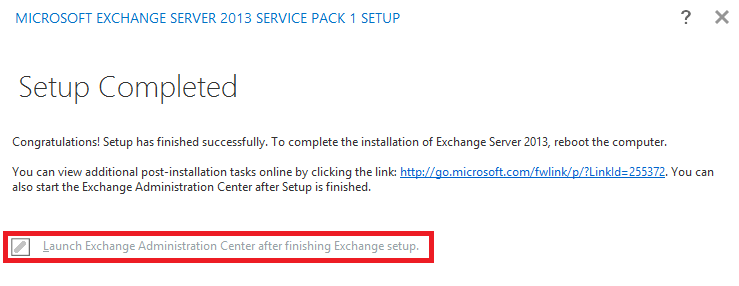
18. We got the successful installation, now you can select the check box in Launch Exchange Administration Center after finishing Exchange setup, You will get the below login screen. If not you can close this page and open IE then type in the URL https://”servername”/ecp/ EX: https://2013exc01/ecp/ you will get the below login screen.
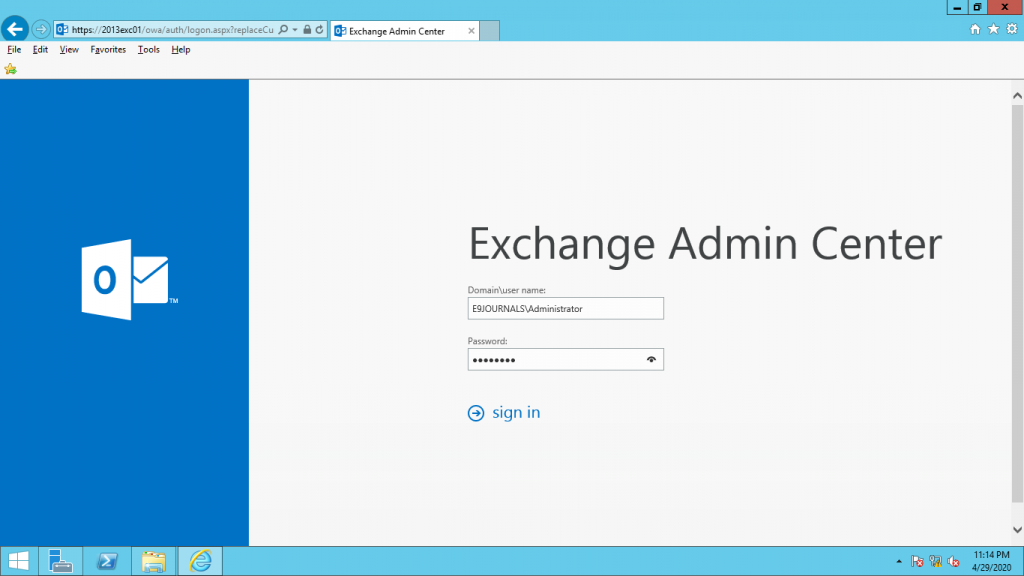
19. In this Exchange Admin Center you can type your root domain Username and Administrator password to login. Example: E9JOURNALS\Administrator.
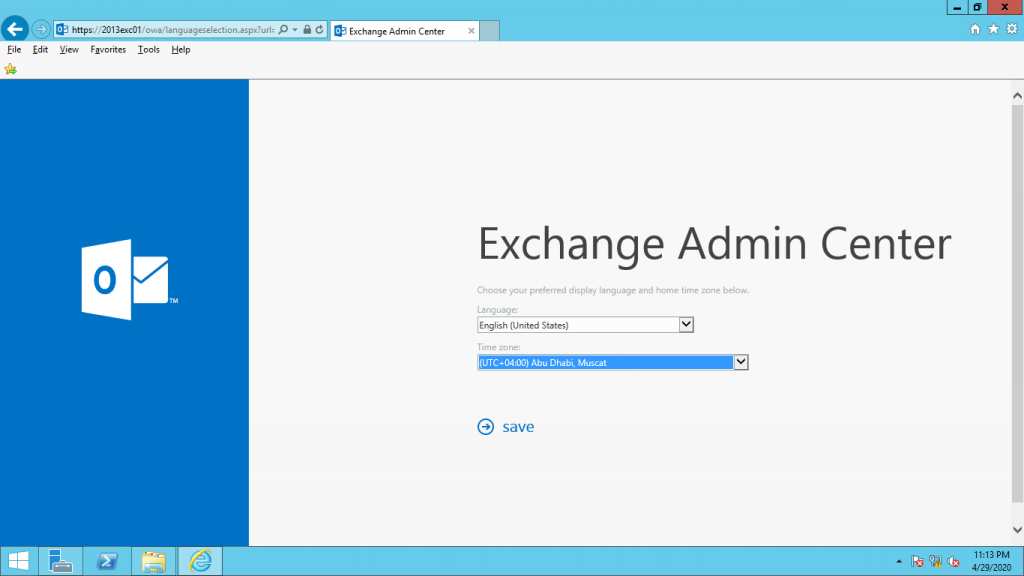
20. Now you can select the Language and Time Zone and click save.
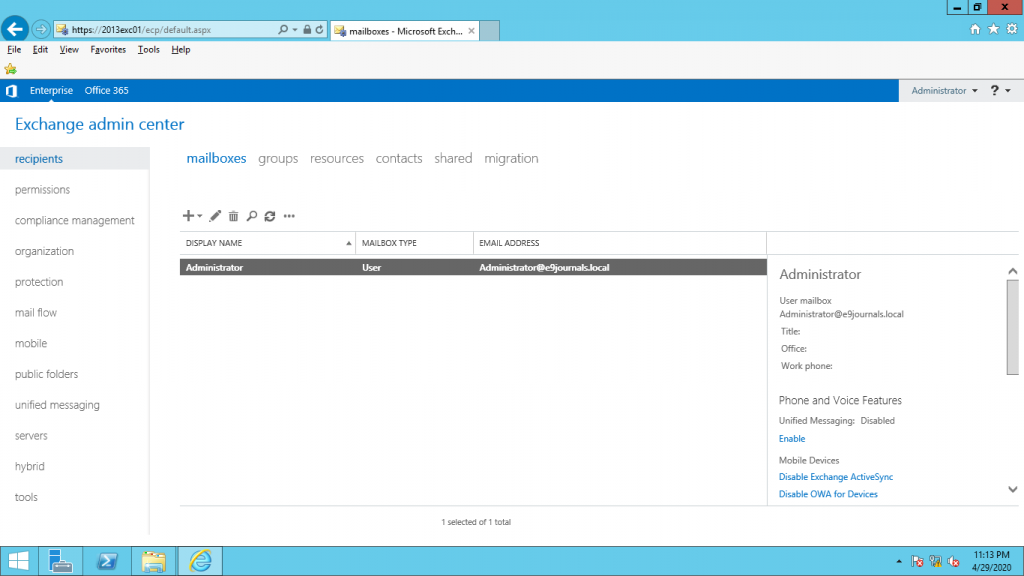
21. Now Successfully we got the Exchange Admin Center and this server is ready for further configuration.