Creating DAG Step-by-Step in Exchange Server 2010
First before creating DAG we need to make sure Network setup is set in proper in place.
Configure Network Settings
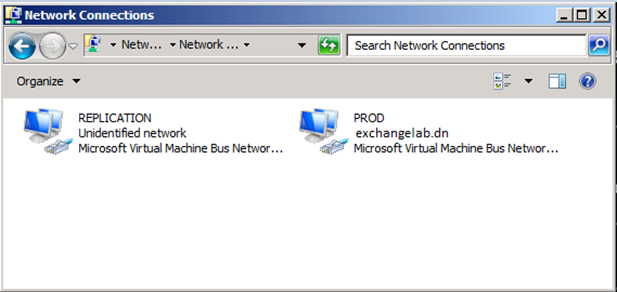
As already mentioned, two NICs have been installed in each server. Let us look at the way each NIC has been configured. To do so, open Network Connections. Here we have the NICs listed, and as you can see we have a PROD (connecting to the production network and providing MAPI connectivity) and a REPLICATION (connected to an isolated network) interface.
Now Click Start -> Run -> in search box type “NCPA.CPL” -> Enter
Optionally, you can uncheck QoS Packet Scheduler and Internet Protocol Version 6 (TCP/IP v6).
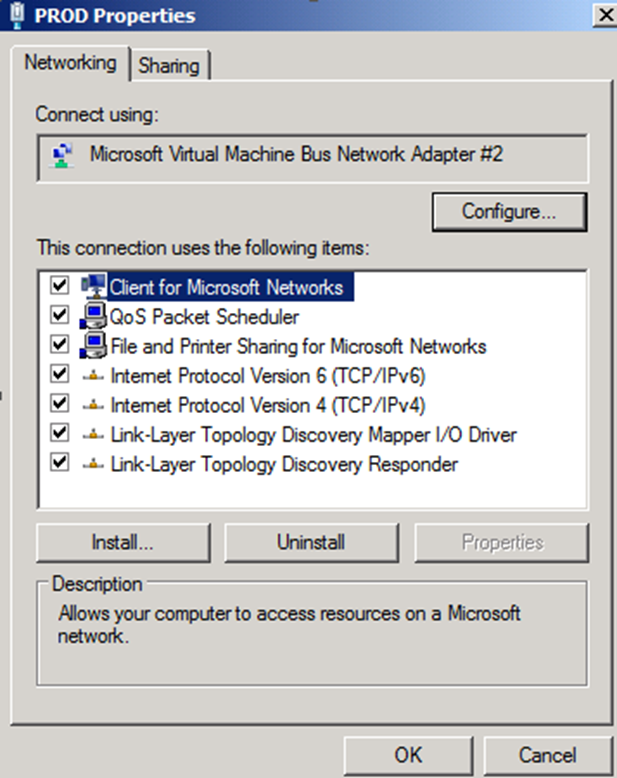
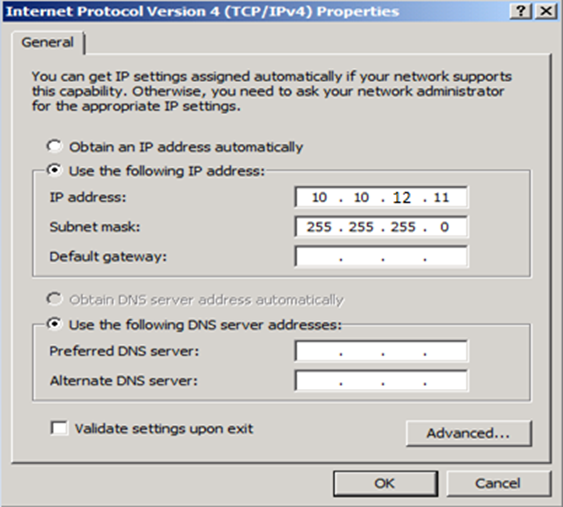
Properties of PROD Interface
Open the property page of Internet Protocol Version 4 (TCP/IPv4). Here we have a static IP address configured as well as the other necessary settings (default gateway, subnet mask, and DNS server).
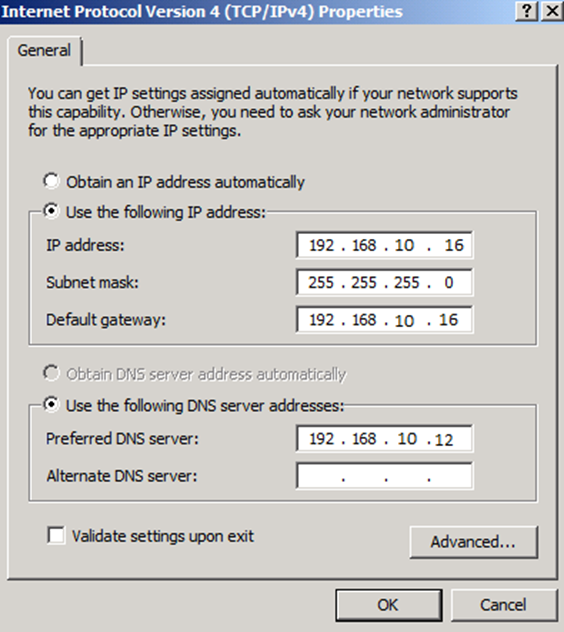
When you have configured the NIC correspondingly, close the property page by clicking OK twice.
It’s time to configure the network settings for the “REPLICATION” interface, so let us open the property page of the “REPLICATION” NIC. Uncheck “Client for Microsoft Networks” and “File and Printer Sharing for Microsoft Networks”.
Optionally, you can uncheck QoS Packet Scheduler and Internet Protocol Version 6 (TCP/IP v6).

Properties for the Replication Interface
Now open property page of “Internet Protocol Version 4 (TCP/IPv4)” and enter an IP address and subnet mask on the isolated replication subnet. Since this NIC solely is used for replication, seeding and heartbeats, you should not specify any default gateway or DNS servers.
Note:
If routing on the “REPLICATION” interface for some reason is necessary between the two servers, you should use static routes instead of specifying a default gateway.
TCP/IP Version 4 properties for the REPLICATION interface
Now click “Advanced” and uncheck “Register this connection’s addresses in DNS” and then click “OK” twice.

Advanced TCP/IP Properties for REPLICATION interface
Now that we have configured each NIC, we must make sure the “PROD” NIC is listed first on the binding order list. To bring up the binding order list, you must press the ALT key, and then select Advanced > Advanced Settings.
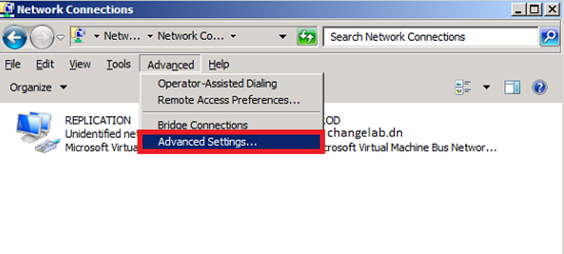
Selecting Advanced Settings in the Network Connection menu
If not already the case, move the PROD NIC to the top as shown below
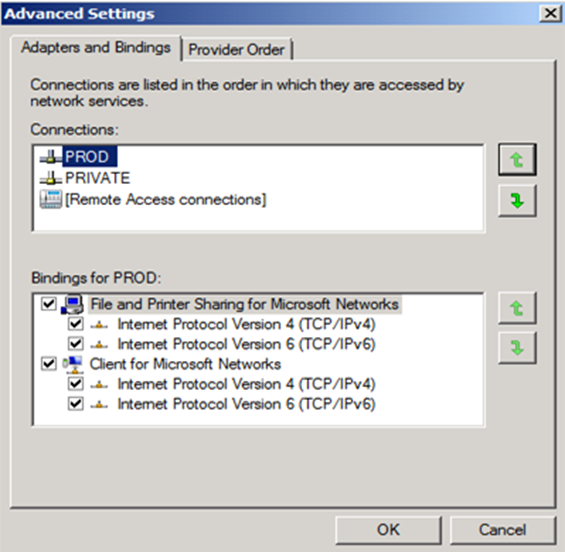
Click OK and close the Network Connections window.
Note: You should of course make sure the above steps are performed on both servers.
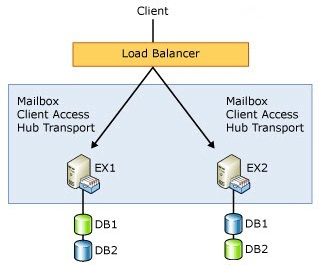
Creating the Database Availability Group in Exchange 2010
With that we are actually ready to create the DAG itself. This can both be done via the Exchange Management Console or the Exchange Management Shell. In this article we will use the console. So under the Mailbox node, select the Database Availability Group tab, then right-click somewhere in the white area. In the context menu, select New Database Availability Group as shown below.
Now open EMC (Exchange Management Console) and click New Database Availability Group as shown below.

Selecting New Database Availability Group in the context menu
In the Database Availability Group wizard, enter a name for the new DAG. Also, specify the witness server and the witness directory on that server. When you have done so, click New.
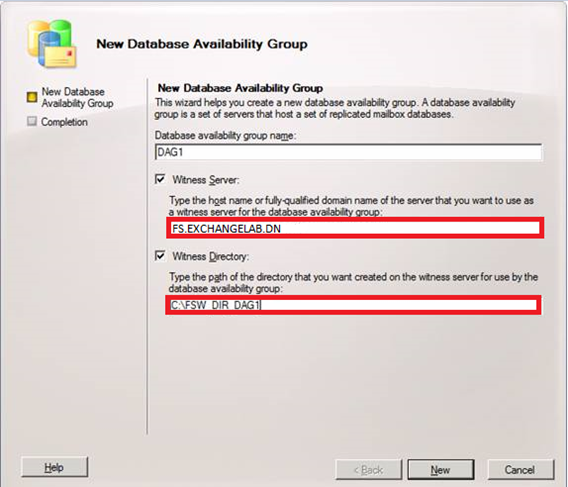
Specifying the DAG name as well as witness server and directory as mentioned above
On the Completion page, we get a warning that the specified witness server is not an Exchange Server. You can ignore this.
Click Finish to exit
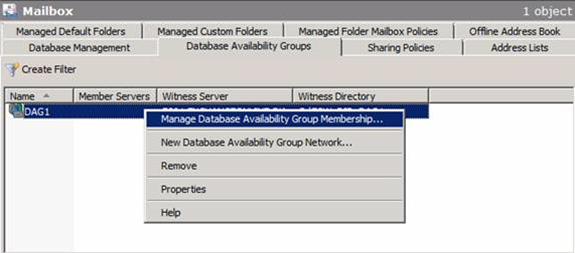
Now that we have created the DAG we can move on and add the two Mailbox servers as member servers. To do so, right-click on the newly created DAG and select Manage Database Availability Group Membership in the context menu as shown below.
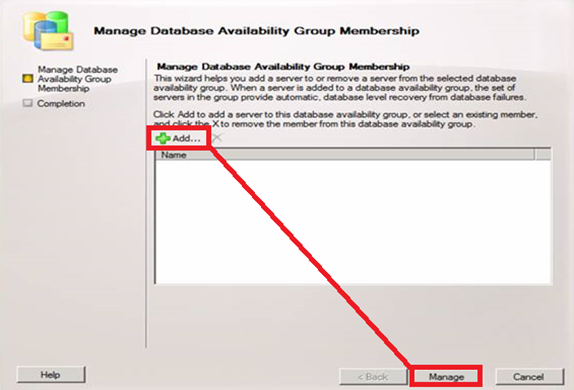
This opens the Manage Database Availability Group Membership wizard, where we click Add.
Now select the two servers and click OK.
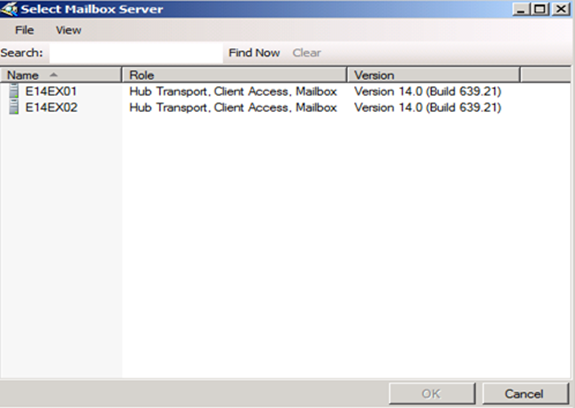
Adding member servers to the Database Availability Group
Click Manage.
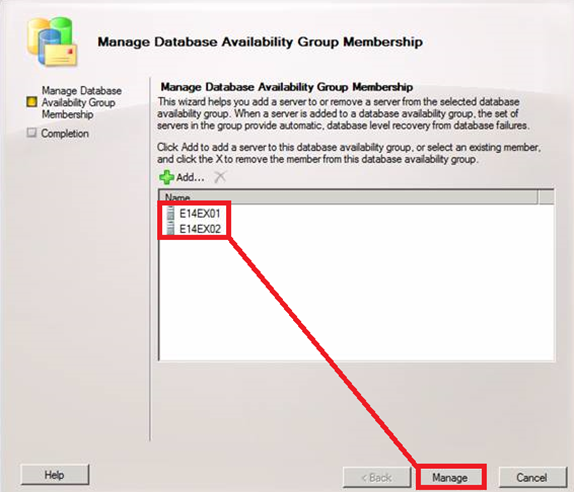
Member servers added to the Database Availability Group
The failover clustering component will now be installed on each server. Then the DAG will be created and configured accordingly. This can take several minutes based on your Network.
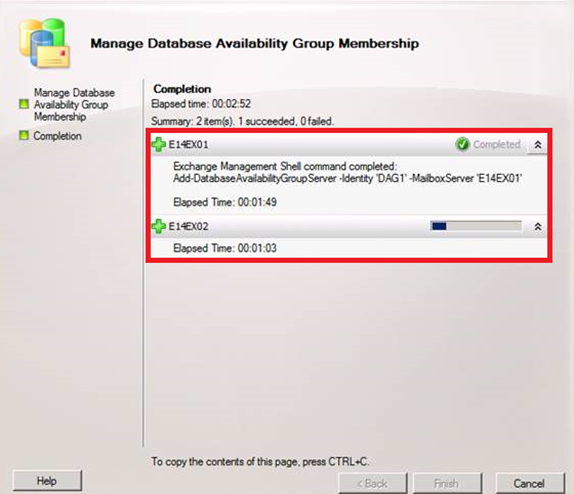
Waiting for the Manage Database Availability Group Membership wizard to complete
If you do not have DHCP available on the network while the member servers are being added to the DAG, you will get the warning message.