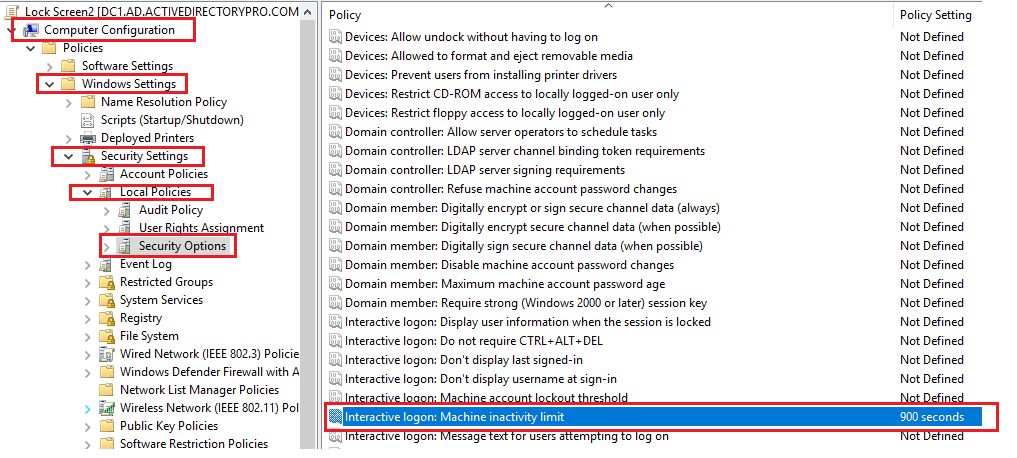
Configuring the lock screen in a Windows environment using Group Policy allows administrators to standardize the lock screen across all users in a domain. Starting with Windows 10 (version 1607) and later, Group Policy provides the ability to enforce a custom lock screen image.
Below is a step-by-step guide to configure the lock screen using Group Policy.
Prerequisites:
- Group Policy Management on a Domain Controller (or a computer with admin privileges).
- A shared folder where the lock screen image will be stored, accessible by all target computers (e.g.,
\\Server\LockScreen\lockscreen.jpg). - Administrative privileges to configure Group Policy and apply it to users/computers.
Step-by-Step Guide:
1. Prepare the Lock Screen Image
- Place the lock screen image on a network share that is accessible to all client computers. Ensure that the image is in a supported format, such as
.jpg,.png, or.bmp. - For example, save the image at:
\\Server\LockScreen\lockscreen.jpg - Ensure the image file has read permissions for all users/computers that will apply the policy.
2. Open Group Policy Management Console (GPMC)
- On a computer with Group Policy Management (such as a server), press
Windows + R, typegpmc.msc, and press Enter to open the Group Policy Management Console (GPMC).
3. Create or Edit a Group Policy Object (GPO)
- In Group Policy Management, navigate to your domain or organizational unit (OU) where you want the policy to be applied.
- Right-click the target domain or OU and choose Create a GPO in this domain, and Link it here (or simply Edit an existing GPO if you want to modify a previously created policy).
- Name the GPO something like “Corporate Lock Screen” or “Lock Screen Configuration”, and click OK.
4. Edit the GPO to Configure the Lock Screen
- Right-click the new GPO and select Edit.
- In the Group Policy Management Editor, navigate to:mathematicaCopy code
Computer Configuration > Administrative Templates > Control Panel > Personalization
5. Enable the “Force a Specific Default Lock Screen Image” Policy
- In the Personalization folder, look for the policy setting called “Force a specific default lock screen image”.
- Double-click the “Force a specific default lock screen image” policy to open its settings.
- Set the policy to Enabled.
- In the Options section, provide the full UNC path to the lock screen image. For example:arduinoCopy code
\\Server\LockScreen\lockscreen.jpg - Click OK to apply the setting.
6. Apply the Group Policy to Client Computers
- The Group Policy setting will be applied during the next Group Policy refresh cycle, which typically happens every 90 minutes. However, you can force an immediate update by running the following command on the client computers:bashCopy code
gpupdate /force - Alternatively, you can restart the target machines to apply the policy immediately.
7. Verify the Lock Screen Configuration
- After the GPO is applied, lock the computer by pressing
Win + Lto verify that the lock screen image is applied as expected. - The lock screen image should now be displayed according to the settings you’ve configured in the GPO.
8. Troubleshooting
- If the lock screen image isn’t applied correctly, consider the following:
- File permissions: Ensure that the shared folder containing the lock screen image has read permissions for the computers or users that need access.
- Correct UNC path: Double-check that the UNC path to the image is correct and accessible.
- Group Policy application: Run
gpresult /ror use the Group Policy Results tool in GPMC to verify that the policy is being applied to the target machines. - Group Policy conflicts: Ensure there are no conflicting Group Policies that may override the lock screen setting.
Additional Considerations:
- Multiple GPOs: If you need different lock screen images for different user groups or organizational units, you can create separate GPOs and apply them to specific OUs.
- Targeting Specific Users or Groups: You can use Security Filtering or WMI Filtering to apply the GPO only to certain users or groups of computers, allowing more granular control.
- Testing: Before rolling out the policy organization-wide, test the configuration on a small group of machines to ensure it works as expected.
Summary of Steps:
- Prepare the lock screen image on a network share.
- Create/Edit a GPO in Group Policy Management.
- Configure the GPO to use the specific lock screen image via the “Force a specific default lock screen image” policy.
- Apply the GPO by updating or restarting client machines.
- Verify that the lock screen is applied as expected.
By following these steps, you can successfully configure a consistent lock screen across multiple computers in your organization using Group Policy.