To map network drives using Group Policy based on Active Directory (AD) Groups, you can use Group Policy Preferences. This method allows you to map drives to users based on their membership in specific AD groups. Here’s a step-by-step guide to configure it:
Step 1: Open Group Policy Management
- Press
Win + Rto open the Run dialog and typegpmc.msc, then press Enter to open the Group Policy Management Console (GPMC). - In the left pane, navigate to the Group Policy Objects section.
Step 2: Create or Edit a Group Policy Object (GPO)
- Right-click on the Group Policy Objects node and choose New to create a new GPO.
- Name the GPO something relevant, like “Map Network Drives for Group X.”
- Right-click the newly created GPO and click Edit.
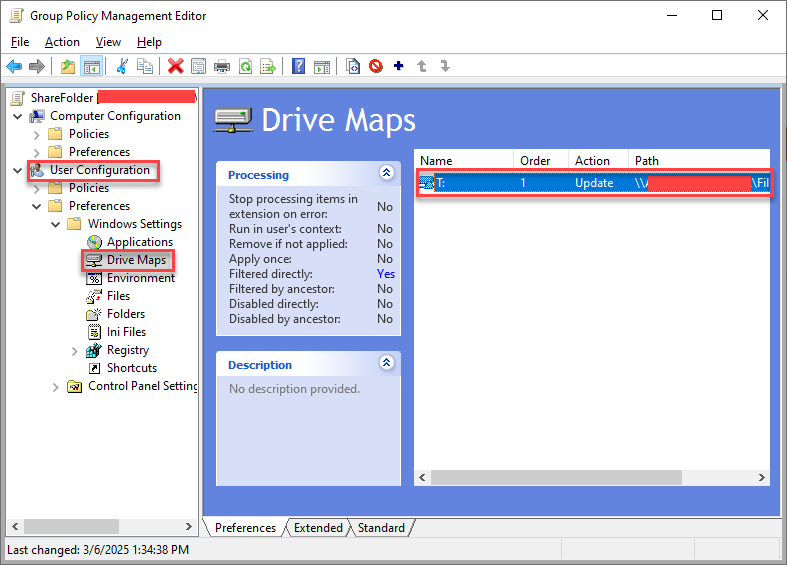
Step 3: Configure Drive Mapping in the GPO
- In the Group Policy Management Editor, navigate to:
User Configuration -> Preferences -> Windows Settings -> Drive Maps - Right-click on Drive Maps and select New → Mapped Drive.
Step 4: Configure the Mapped Drive
- Action: Set to Create (or Replace if you want to overwrite existing settings).
- Location: Enter the network path for the drive (e.g.,
\\ServerName\SharedFolder). - Drive Letter: Choose the letter you want to assign to the mapped drive.
- Reconnect: Check this option if you want the drive to reconnect automatically when the user logs in.
- Label as: Optionally, enter a label for the drive.
Step 5: Apply Filtering Based on Group Membership
- Under the Common tab, check the box for Item-level targeting.
- Click the Targeting… button to open the Item-level Targeting Editor.
Step 6: Add Group-Based Targeting
- In the Item-level Targeting Editor, click New Item and select Security Group.
- In the Security Group field, click the Browse button and select the AD group you want to target (e.g., “Sales Department”).
- Click OK to apply the targeting filter.
Step 7: Link the GPO to the Appropriate Organizational Unit (OU)
- In Group Policy Management, right-click the OU that contains the user accounts for the group(s) you are targeting.
- Click Link an Existing GPO and select the GPO you just created.
- Click OK to apply the GPO.
Step 8: Force a Group Policy Update
- On the user machines, you can either wait for the policy to refresh on its own, or you can manually force a policy update by running the following command in Command Prompt:
gpupdate /force
Step 9: Test the Configuration
Log in with a user account that is a member of the specified AD group and ensure the mapped network drive appears as expected.
Summary:
This method uses Group Policy Preferences and Item-Level Targeting to map network drives based on group membership in Active Directory. The drive mapping is only applied to users who are members of the specified AD groups, ensuring that only the appropriate users receive the drive mappings.